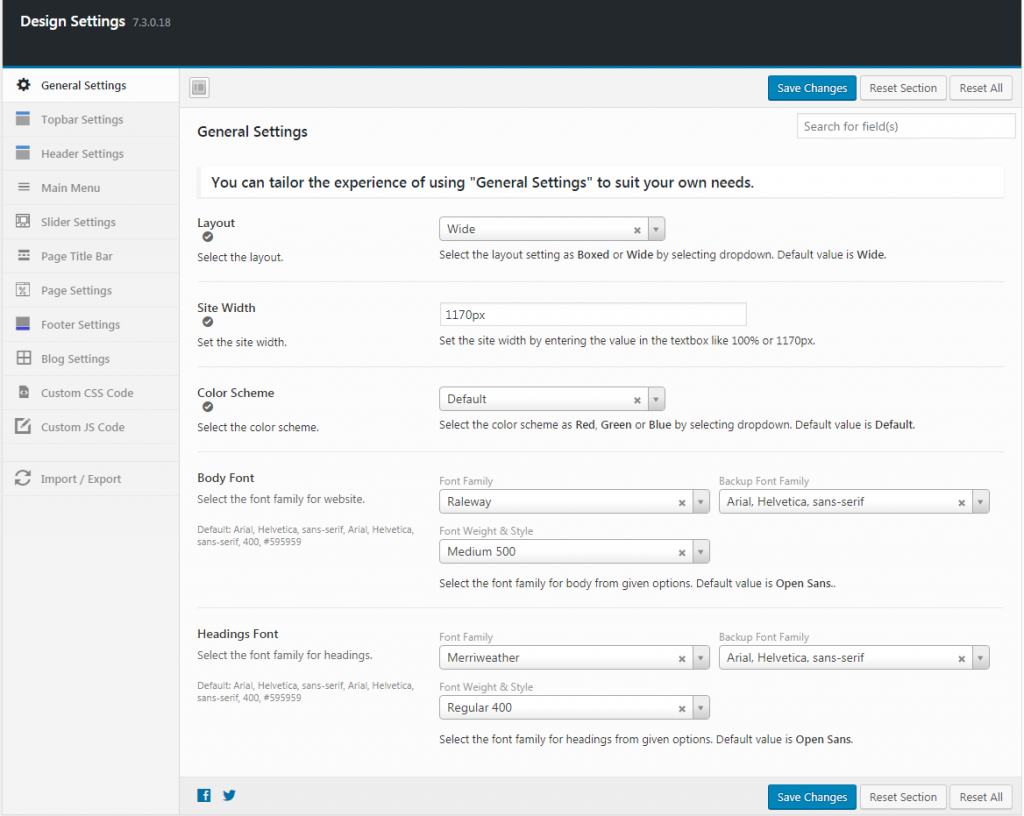
Here you can make general settings for your complete website. This setting allows you to set the layout, site-width, color scheme, body font
- Layout: Select the layout from the pull-down box. Chose between wide or boxed.
- Site Width: Set the site width by entering the value in the textbox like 100% or 1170px.
- Color Scheme: Select the color scheme as Red, Green or Blue from the pull-down box. Otherwise, it will show default color.
- Body Font: Select the font-family, backup font-family and font-weight & style from the available drop-down boxes.
Default value is open sans.
- Headings Font: Select the font-family, backup font-family and font-weight & style from the given options. Default value is open sans.
- Save Changes: To make your changes effective click on the save changes button.
- Reset Section: This is to reset the changes
that made in the section.
- Reset All: Click this button to reset all the sections.
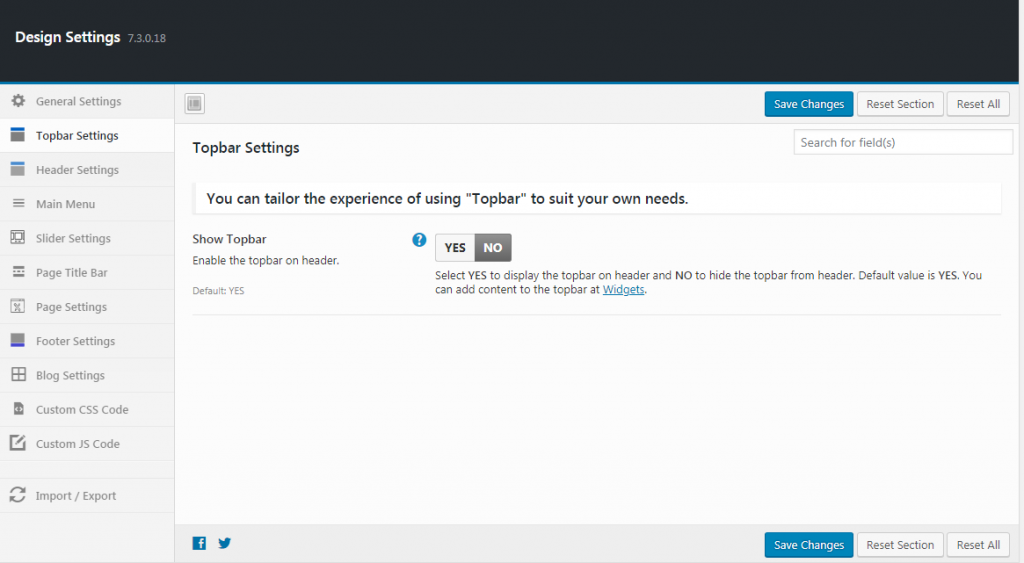
- Show Topbar: Select YES to display the topbar on header and NO to hide the topbar from header. By default it is enabled. You can add content to the topbar from Widgets.
- Topbar Wide Layout: Select YES to set the topbar to 100% width of browser and NO to take default width. Default value is NO.
- Customize Topbar: Personalize the topbar design. Select YES for more options to customize the style of topbar. Default value is NO
- Topbar Background Color: Select a background color for topbar. Default color is #FFFFFF (white). Mark tick for background transparent. Click here for color codes.
- Topbar Text Color: Select text color for topbar. Default color is #333333 (black). Mark tick for link color transparent. Click here for color codes.
- Topbar Link Hover Color: Select a link hover color for topbar. Default color is #333333 (black). Mark tick for link hover color transparent. Click here for color codes.
- Save Changes: To make your changes effective click on the save changes button.
- Reset Section: This is to reset the changes that made in the section.
- Reset All: Click this button to reset all the sections.
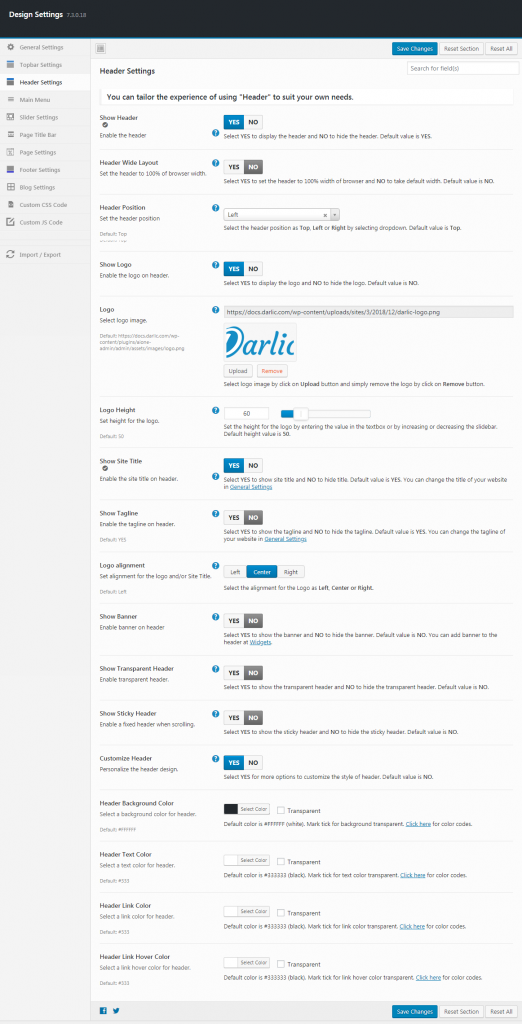
- Show Header:
Select YES to display the header and NO to hide the header.
- Header Wide Layout:
Select YES to set the header to 100% width of browser and NO to take default width.
- Header Position:
Select the header position as Top, Left or Right by selecting dropdown.
- Show Logo:
Select YES to display the logo and NO to hide the logo.
- Logo:
Select
- Logo Height:
Set the height for the logo by entering the value in the textbox or by increasing or decreasing the
- Show Site Title:
Select YES to show site title and NO to hide
- Show Tagline:
Select YES to show the tagline and NO to hide the tagline.
- Logo alignment:
Select the alignment for the Logo as Left, Center or Right.
- Show Banner:
Select YES to show the banner and NO to hide the banner.
- Show Transparent Header
Select YES to show the transparent header and NO to hide the transparent header.
- Show Sticky Header
Select YES to show the sticky header and NO to hide the sticky header.
- Customize Header
Select YES for more options to customize the style of header.
- Header Background Color
Default color is #FFFFFF (white). Mark tick for background transparent. Click here for color codes.
- Header Text Color
Default color is #333333 (black). Mark tick for text color transparent. Click here for color codes.
- Header Link Color
Default color is #333333 (black). Mark tick for link color transparent. Click here for color codes.
- Header Link Hover Color
Default color is #333333 (black). Mark tick for link hover color transparent. Click here for color codes.
- Save Changes
To make your changes effective click on the save changes button.
- Reset Section
This is to reset the changes
- Reset All
Click this button to reset all the sections.
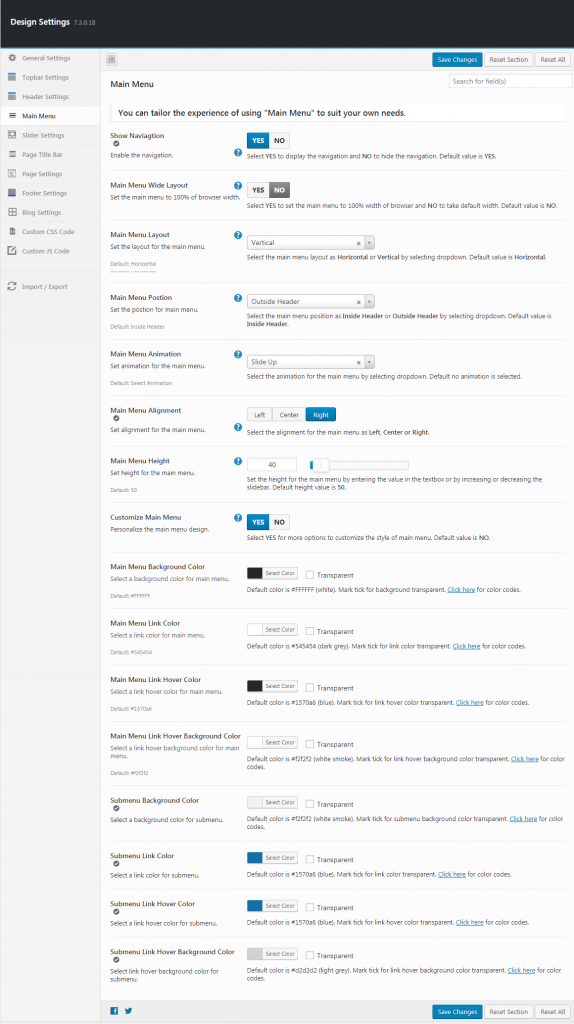
- Show
Navigation :
Select YES to display the navigation and NO to hide the navigation.
- Main Menu Wide Layout
Select YES to set the main menu to 100% width of browser and NO to take default width. Default value is NO.
- Main Menu Layout
Select the main menu layout as Horizontal or Vertical by selecting dropdown.
- Main Menu Position
Select the main menu position as Inside Header or Outside Header by selecting dropdown.
- Main Menu Animation
Select the animation for the main menu by selecting dropdown. Default no animation is selected.
- Main Menu Alignment
Select the alignment for the main menu as Left, Center or Right.
- Main Menu Height
Set the height for the main menu by entering the value in the textbox or by increasing or decreasing the
- Customize Main Menu
Select YES for more options to customize the style of
- Main Menu Background Color
Default color is #FFFFFF (white). Mark tick for background transparent. Click here for color codes.
- Main Menu Link Color
Default color is #545454 (dark grey). Mark tick for link color transparent. Click here for color codes.
- Main Menu Link Hover Color
Default color is #1570a6 (blue). Mark tick for link hover color transparent. Click here for color codes.
- Main Menu Link Hover Background Color
Default color is #f2f2f2 (white smoke). Mark tick for link
- Submenu Background Color
Default color is #f2f2f2 (white smoke). Mark tick for submenu background color transparent. Click here for color codes.
- Submenu Link Color
Default color is #1570a6 (blue). Mark tick for link color transparent. Click here for color codes.
- Submenu Link Hover Color
Default color is #1570a6 (blue). Mark tick for link hover color transparent. Click here for color codes.
- Submenu Link Hover Background Color
Default color is #d2d2d2 (light grey). Mark tick for link
- Save Changes
To make your changes effective click on the save changes button.
- Reset Section
This is to reset the changes made in the section.
- Reset All
Click this button to reset all the sections.
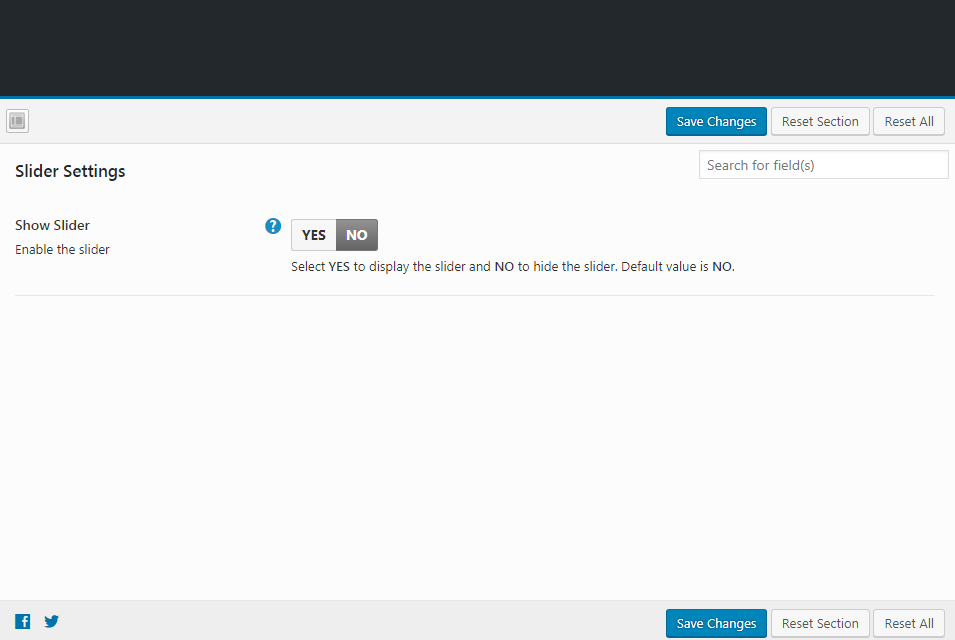
- Show Slider
Select YES to display the slider and NO to hide the slider.
- Slider Wide Layout
Select YES to set the slider to 100% width of browser and NO to take default width.
- Select Slider
Select the slider from
- Save Changes
To make your changes effective click on the save changes button.
- Reset Section
This is to reset the changes that made in the section.
- Reset All
Click this button to reset all the sections.
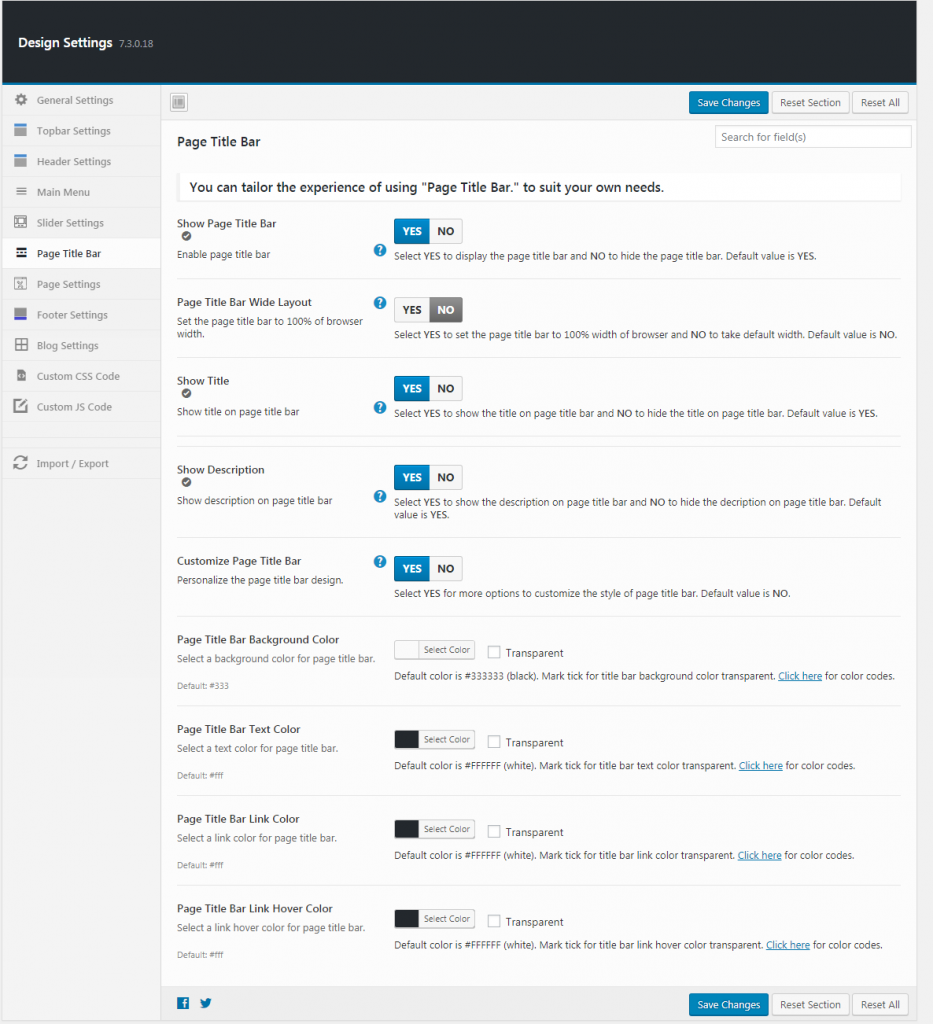
- Show Page Title Bar
Select YES to display the page title bar and NO to hide the page title bar. Default value is YES.
- Page Title Bar Wide Layout
Select YES to set the page title bar to 100% width of browser and NO to take default width. Default value is NO.
- Show Title
Select YES to show the title on
- Show Description
Select YES to show the description on page title bar and NO to hide the decription on page title bar. Default value is YES.
- Customize Page Title Bar
Select YES for more options to customize the style of page title bar. Default value is NO.
- Page Title Bar Background Color
Default color is #333333 (black). Mark tick for title bar background color transparent. Click here for color codes.
- Page Title Bar Text Color
Default color is #FFFFFF (white). Mark tick for title bar text color transparent. Click here for color codes.
- Page Title Bar Link Color
Default color is #FFFFFF (white). Mark tick for title bar link color transparent. Click here for color codes.
- Page Title Bar Link Hover Color
Default color is #FFFFFF (white). Mark tick for title bar link hover color transparent. Click here for color codes.
- Save Changes
To make your changes effective click on the save changes button.
- Reset Section
This is to reset the changes that made in the section.
- Reset All
Click this button to reset all the sections.
- Page Wide Layout
Select YES to set the page layout to 100% width of browser and NO to take default width.
- Show Page Top Area
Select YES to display
- Page Top Area Wide Layout
Select YES to set the page top area layout to 100% width of browser and NO to take default width. Default value is NO.
- Customize Page Top Area
Select YES for more options to customize the style of
- Page Top Area Background Color
Default color is #333333 (black). Mark tick for page top area background color transparent. Click here for color codes.
- Page Top Area Heading Color
Default color is #FFFFFF (white). Mark tick for top area heading color transparent. Click here for color codes.
- Page Top Area Text Color
Default color is #FFFFFF (white). Mark tick for top area text color transparent. Click here for color codes.
- Page Top Area Link Color
Default color is #FFFFFF (white). Mark tick for top area link color transparent. Click here for color codes.
- Page Top Area Link Hover Color
Default color is #FFFFFF (white). Mark tick for top area link
- Show Page Bottom Area
Select YES to display
- Page bottom Area Wide Layout
Select YES to set the page bottom area to 100% width of browser and NO to take default width.
- Show Page Padding
Select YES to display the page padding and NO to hide the page padding.
- Customize Page Bottom Area
Select YES for more options to customize the style of page bottom area.
- Page Bottom Area Background Color
Default color is #333333 (black). Mark tick for page bottom area background color transparent. Click here for color codes.
- Page Bottom Area Heading Color
Default color is #FFFFFF (white). Mark tick for page bottom area heading color transparent. Click here for color codes.
- Page Bottom Area Text Color
Default color is #FFFFFF (white). Mark tick for page bottom area text color transparent. Click here for color codes.
- Page Bottom Area Link Color
Default color is #FFFFFF (white). Mark tick for page bottom area link color transparent. Click here for color codes.
- Page Bottom Area Link Hover Color
Default color is #FFFFFF (white). Mark tick for page bottom area link hover color transparent. Click here for color codes.
- Show Left Sidebar
Select YES to display left sidebar and NO to hide
- Show Right Sidebar
Select YES to display right sidebar and NO to hide
- Customize Sidebar
Select YES for more options to customize the style of sidebar. Default value is NO.
- Sidebar Background Color
Default color is #333333 (black). Mark tick for sidebar background color transparent. Click here for color codes.
- Sidebar Heading Color
Default color is #333333 (black). Mark tick for sidebar heading color transparent. Click here for color codes.
- Sidebar Text Color
Default color is #FFFFFF (white). Mark tick for sidebar text color transparent. Click here for color codes.
- Sidebar Link Color
Default color is #FFFFFF (white). Mark tick for sidebar link color transparent. Click here for color codes.
- Sidebar Link Hover Color
Default color is #FFFFFF (white). Mark tick for sidebar link hover color transparent. Click here for color codes.
- Show Content Top Area
Select YES to display the content top area and NO to hide the content top area. Default value is NO.
- Show Content Bottom Area
Select YES to display the content bottom area and NO to hide the content bottom area. Default value is NO.
- Customize Page
Select YES for more options to customize the style of page. Default value is NO.
- Show Page Content Padding
Select YES for enable page content padding. Default value is NO.
- Page Background Color
Default color is #FFFFFF (white). Mark tick for page background color transparent. Click here for color codes.
- Page heading Color
Default color is #333333 (black). Mark tick for page heading color transparent. Click here for color codes.
- Page Text Color
Default color is #333333 (black). Mark tick for page text color transparent. Click here for color codes.
- Page Link Color
Default color is #333333 (black). Mark tick for page link color transparent. Click here for color codes.
- Page Link Hover Color
Default color is #333333 (black). Mark tick for page link
- Save Changes
To make your changes effective click on the save changes button.
- Reset Section
This is to reset the changes that made in the section.
- Reset All
Click this button to reset all the sections.
- Show Footer Widgets
Select YES to display the footer widgets and NO to hide the footer widgets.
- Footer Wide Layout
Select YES to set the footer to 100% width of browser and NO to take default width.
- Customize Footer
Select YES for more options to customize the style of footer. Default value is NO.
- Footer Background Color
Default color is #333333 (black). Mark tick for background color transparent. Click here for color codes.
- Footer Heading Color
Default color is #333333 (black). Mark tick for heading color transparent. Click here for color codes.
- Footer Text Color
Default color is #FFFFFF (white). Mark tick for text color transparent. Click here for color codes.
- Footer Link Color
Default color is #FFFFFF (white). Mark tick for link color transparent. Click here for color codes.
- Footer Link Hover Color
Default color is #FFFFFF (white). Mark tick for link hover color transparent. Click here for color codes.
FOOTER COPYRIGHT SETTINGS
- Show copyright bar
Select YES to display the copyright bar and NO to hide the copyright bar. Default value is YES.
- Copyright Bar Wide Layout
Select YES to set copyright bar to 100% width of browser and NO to take default width. Default value is NO.
- Customize Footer Copyright
Select YES for more options to customize the style of footer copyright. Default value is NO.
- Footer Copyright Background Color
Default color is #333333 (black). Mark tick for background color transparent. Click here for color codes.
- Footer Copyright Text Color
Default color is #FFFFFF (white). Mark tick for text color transparent. Click here for color codes.
- Footer Copyright Link Color
Default color is #FFFFFF (white). Mark tick for link color transparent. Click here for color codes.
- Footer Copyright Link Hover Color
Default color is #FFFFFF (white). Mark tick for link hover color transparent. Click here for color codes.
- Save Changes
To make your changes effective click on the save changes button.
- Reset Section
This is to reset the changes that made in the section.
- Reset All
Click this button to reset all the sections.
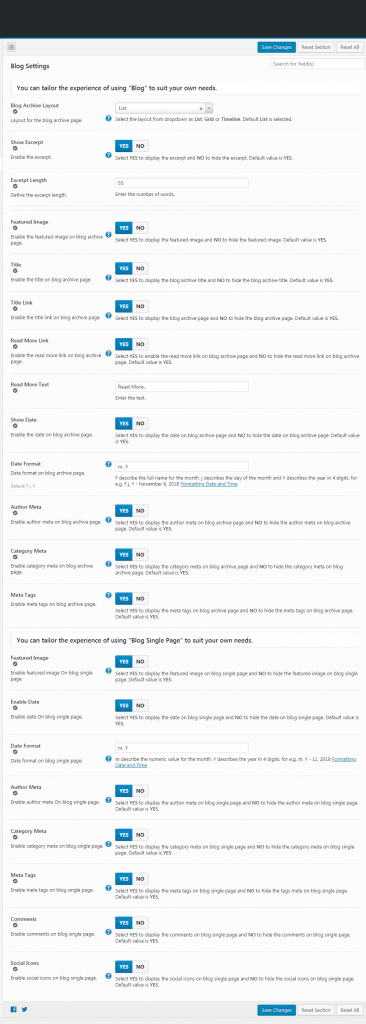
- Blog Archive Layout
Select the layout from dropdown as List, Grid or Timeline. Default List is selected.
- Grid Layout number of Columns
Select whether to display the grid layout in 2, 3 or 4 columns.
- Show Excerpt
Select YES to display the excerpt and NO to hide the excerpt. Default value is YES.
- Excerpt Length
Enter the number of words.
- Featured Image
Select YES to display the featured image and NO to hide the featured image. Default value is YES.
- Title
Select YES to display the blog archive title and NO to hide the blog archive title.
- Title Link
Select YES to display the blog archive page and NO to hide the blog archive page. Default value is YES.
- Read More Link
Select YES to enable the read more link on blog archive page and NO to hide the read more link on blog archive page. Default value is YES.
- Read More Text
Enter the text.
- Show Date
Select YES to display the date on blog archive page and NO to hide the date on blog archive page. Default value is YES.
- Date Format
F describe the full name for the month, j describes the day of the month and Y describes the year in 4 digits. for e.g. F j, Y - November 6, 2018 Formatting Date and Time
- Author Meta
Select YES to display the author meta on blog archive page and NO to hide the author meta on blog archive page. Default value is YES.
- Category Meta
Select YES to display the category meta on blog archive page and NO to hide the category meta on blog archive page. Default value is YES.
- Meta Tags
Select YES to display the meta tags on
- Featured Image
Select YES to display the featured image on blog single page and NO to hide the featured image on blog single page.
- Enable Date
Select YES to display the date on blog single page and NO to hide the date on blog single page.
- Date Format
m describe the numeric value for the month, Y describes the year in 4 digits. for e.g. m, Y - 11, 2018 Formatting Date and Time
- Author Meta
Select YES to display the author meta on blog single page and NO to hide the author meta on blog single page. Default value is YES.
- Category Meta
Select YES to display the category meta on blog single page and NO to hide the category meta on blog single page. Default value is YES.
- Meta Tags
Select YES to display the meta tags on blog single page and NO to hide the tags meta on blog single page. Default value is YES.
- Comments
Select YES to display the comments on blog single page and NO to hide the comments on blog single page. Default value is YES.
- Social Icons
Select YES to display the social icons on blog single page and NO to hide the social icons on blog single page. Default value is YES.
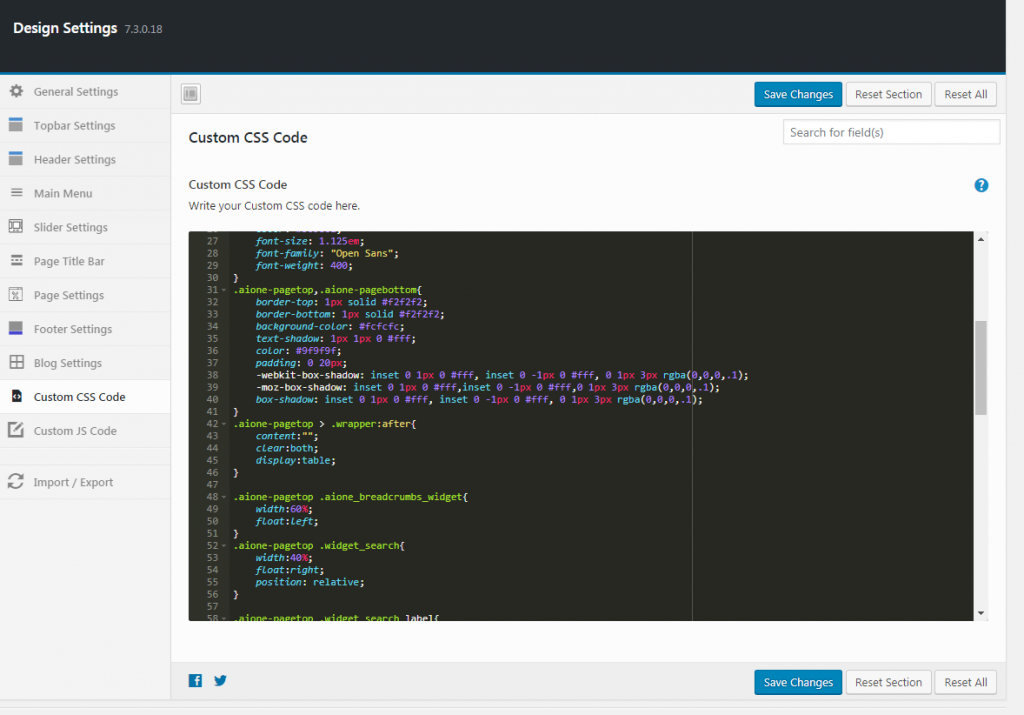
In the provided area you can add custom code.
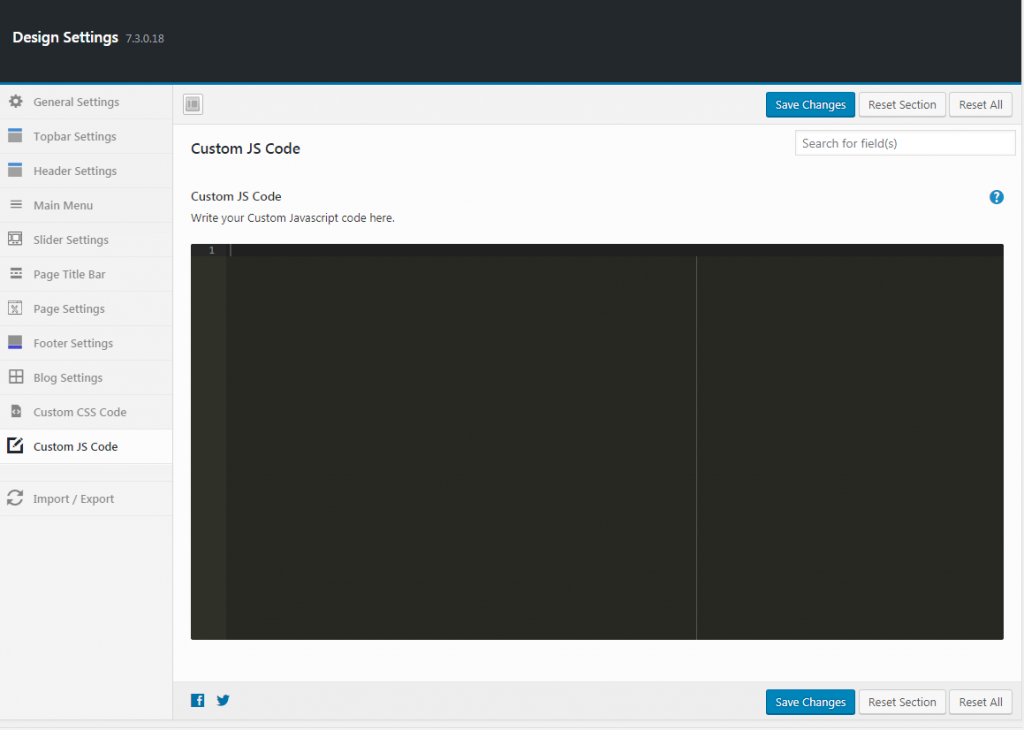
In the provided area you can add js code.
- Save Changes
To make your changes effective click on the save changes button.
- Reset Section
This is to reset the changes that made in the section.
- Reset All
Click this button to reset all the sections.
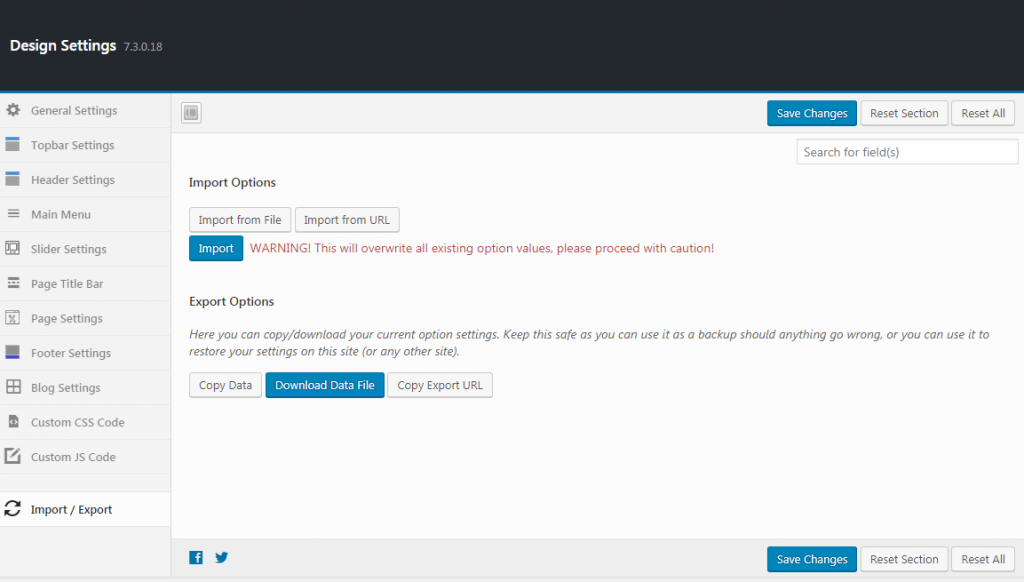
Import options
Here you can import your options settings. Beware this will overwrite all existing option values, please proceed with caution!
Export Options
Here you can copy/download your current option settings. Keep this safe as you can use it as a backup as anything could go wrong, or you can use it to restore your settings on this site (or any other site).
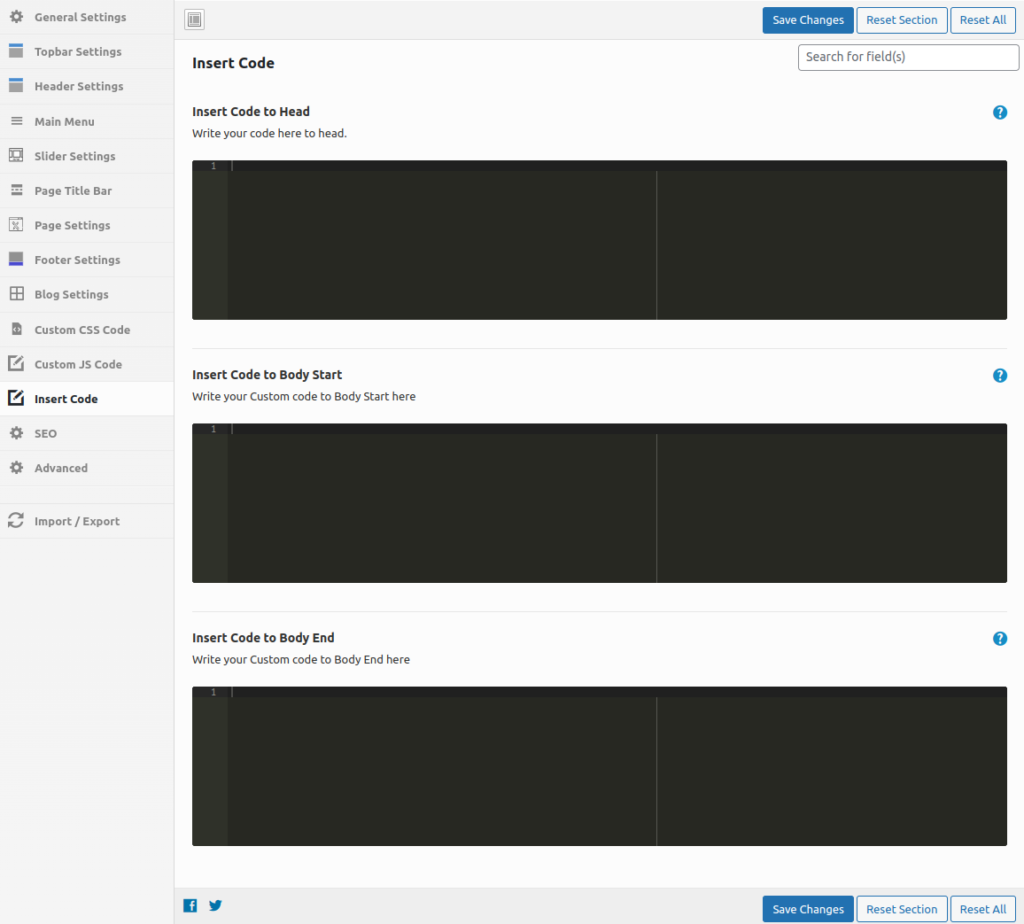
Insert code option allow you to add code to the head, body Start and Body ends of the website.
Insert Code to Head: It will create a section in your site’s backend, with a dedicated area for the header. You can insert your code into this area, click save, and it will automatically be updated under your site’s <head> section.
Insert Code to Body Start: It will create a section in your site’s backend, with a dedicated area for the body start. You can insert your code into this area, click save, and it will automatically be updated at the start of the <body> of your site.
Insert Code to Body End: It will create a section in your site’s backend, with a dedicated area for the body end. You can insert your code into this area, click save, and it will automatically be updated at the end of the <body> of your site.
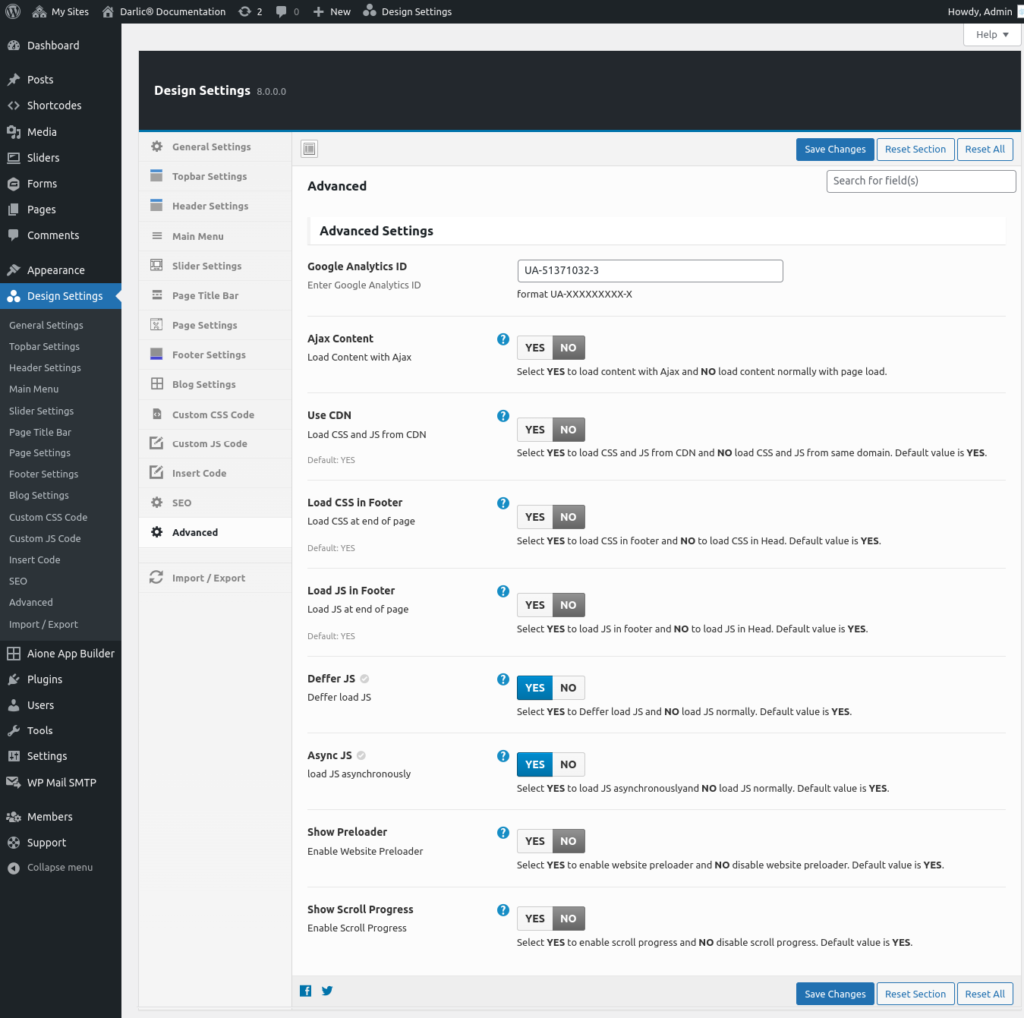
Advanced Settings allows you to manage advanced features like Google Analyutics, Ajax Content, Use CDN, Load CSS in Footer, Load JS in Footer, Deffer JS, Async JS, Show Preloader, Show Scroll Progress etc. Let's discuss above list one by one.
Google Analytics ID: You can add the Google Analytics ID to your Website here.
Ajax Content: Select YES to load content with Ajax and NO to load content normally with page load.
Use CDN: Select YES to load CSS and JS from CDN and NO to load CSS and JS from the same domain. The default value is YES.
Load CSS in Footer: Select YES to load CSS in the footer and NO to load CSS in the Head. The default value is YES.
Load JS in Footer: Select YES to load JS in the footer and NO to load JS in the Head. The default value is YES.
Deffer load JS: Select YES to Deffer load JS and NO load JS normally. The default value is YES.
load JS asynchronously: Select YES to load JS asynchronously and NO to load JS normally. The default value is YES.
Show Preloader: Select YES to enable the website preloader and NO to disable the website preloader. The default value is YES.
Show Scroll Progress: Select YES to enable scroll progress and NO to disable scroll progress. The default value is YES.